With the orderentry rules we can determine which rules the orders entered by customers must comply with.
The orderentry rule(s) is/are set up on the Transpas side.
¶ Defining (an) orderentry rule(s)
F11 -> TranspasOnline orderentry rules
We can create one or more orderentry rules via the TranspasOnline orderentry rules screen. If we choose to have all customers use the same input lines, then only 1 line needs to be created here.
Some customers may have to adhere to different rules when entering orders. In this case, we create an extra orderentry rule for this.
¶ What do these fields mean
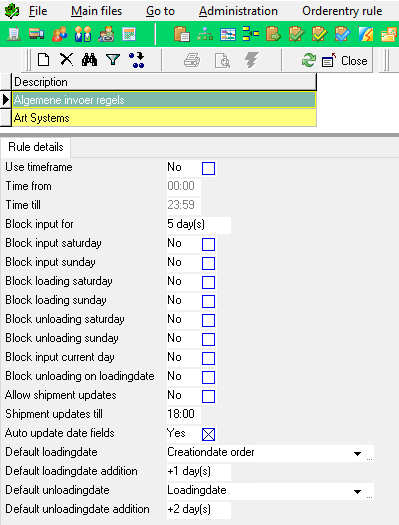
| Use timeframe: | This indicates whether a time window should be used during orderentry. The fields Time from & Time to can be entered if Yes. |
| Block input for: | This prevents customers from entering orders that are more than this number of days in the future. |
| Block input Saturday: | This will block the creation of orders on Saturdays. |
| Block input Sunday: | This will block the creation of orders on Sundays. |
| Block loading Saturday: | Entering a loading date on a Saturday will be blocked. |
| Block loading Sunday: | Entering a loading date on a Sunday will be blocked. |
| Block unloading Saturday: | Entering an unloading date on a Saturday will be blocked. |
| Block unloading Sunday: | Entering an unloading date on a Sunday will be blocked. |
| Block input current day: | Entering a loading date on the day of entering the order will be blocked. |
| Block unloading on loadingdate: | Entering an unloading date on the same date as the loading date will be blocked. |
| Allow shipment updates: | This allows customers to change orders that have already been transferred to Transpas. |
| Shipments updates till: | The time until which an order may be changed. |
| Auto update date fields: | This determines whether the date fields on the order should be filled automatically. |
| Default loadingdate: | Order creation date or Next business day |
| Default loadingdate addition: | The number of days that add to the loading date when an order is created. This works in conjunction with the Default loadingdate setting. |
| Default unloadingdate: | Order creation date, Next business day or Loading date. |
| Default unloadingdate addition: | The number of days that add up to the discharge date when an order is created. This works in conjunction with the Default unload date setting. |
¶ Applying a general Orderentry rule
F11 -> EDI Providers
Applying the created TranspasOnline orderentry rules is done in the EDI Providers screen. In this screen we look up the EDI Provider for TranspasOnline.
On the General tab we can set the general orderentry rule.

In the TranspasOnline orderentry rule field we select an orderentry rule. This orderentry rule applies to all customers who use TranspasOnline.
We also have the option to allow specific customers to use a different orderentry rule.
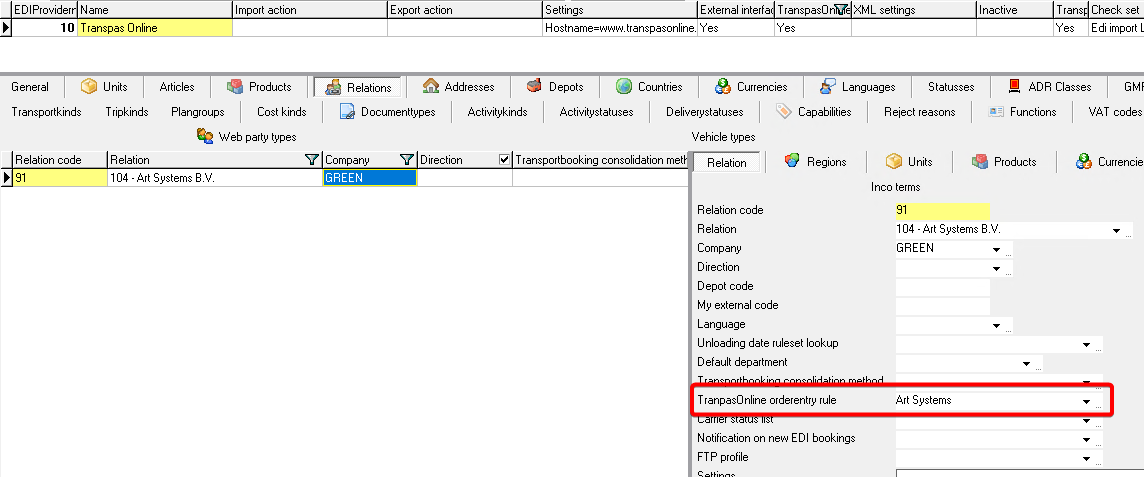
¶ Apply an Orderentry rule for specific customers
Setting up an orderentry rule for specific customers is done in the same EDI Providers screen. Only now we have to look at the Relationships tab.
On this tab we find all customers who use TranspasOnline.
Select the relationship for which you want to set a different orderentry rule and select this orderentry rule in the TranspasOnline order entry rule field.
Just a quick summary of what we have achieved so far:
- We have created one or more orderentry rules in Transpas.
- We have set up a general orderentry rule on the EDI Provider.
- We have set up a different orderentry rule for a specific customer.
Transpas will synchronize the set orderentry rule(s) to TranspasOnline, this can take an average of 15 minutes. After this, the orderentry rules apply.
When we remove the general orderentry line or the customer-specific order entry line in Transpas, Transpas will synchronize again and remove the orderentry lines from TranspasOnline. This also takes an average of 15 minutes.
¶ What does this look like in TranspasOnline?
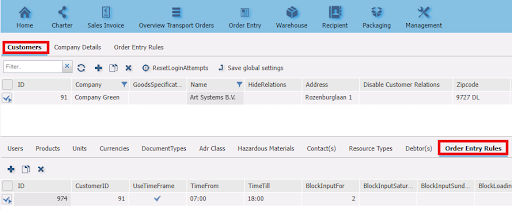
When we log in to TranspasOnline with our admin account, we can see which orderentry rules have been set via *Customers & Users (or via the Management -> Customers & Users) menu.
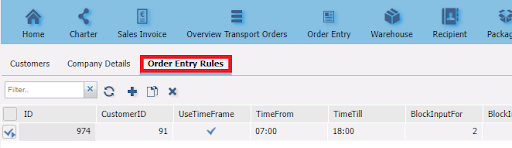
On the top tab Orderentry Rules we find all order entry rules, i.e. the general ones and the customer-specific ones. The lines where the CustomerID field is filled in are customer-specific order entry lines.
Via the Customers -> Orderentry Rules tab we can see which orderentry rule applies per customer.